![branded_update_bb_logo_r_230728-2.png]](https://knowledge.benefitbay.com/hs-fs/hubfs/branded_update_bb_logo_r_230728-2.png?width=234&height=70&name=branded_update_bb_logo_r_230728-2.png)
This guide walks you through signing in to Equifax so you can review and sign off on your company’s ACA 1095 forms.
The first time you sign in, you will create a password and set up Multi-Factor Authentication (MFA). MFA is an extra layer of security: after you enter your password, you also enter a short code from an app on your phone.
|
Before you start Please have these ready:
Please note: Phones, apps and email programs all look a little different, so your screens may not match the screenshots exactly. The steps are the same. |
Part 1: Create Your Password
Step 1: Find your two emails from Equifax
Once your Client Success Manager (CSM) has added you to Equifax, you will receive two emails. Both come from alerts@equifax.com.
|
Can’t find the emails? Check your spam or junk folder. |
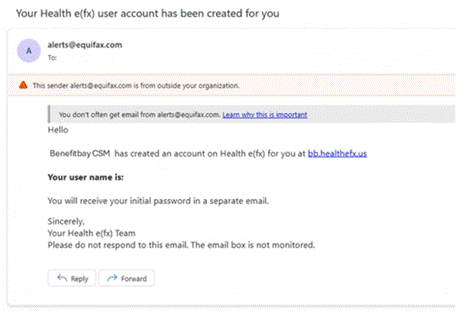
Email 1: Your account has been created. This email contains your username.
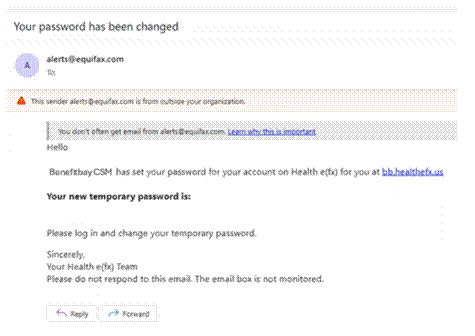
Email 2: Your temporary password. This email contains the temporary password you will use to sign in.
Step 2: Sign in and create a new password
- Open Email 2.
- Click the blue link bb.healthefx.us inside the email.
- Sign in with your username (from Email 1) and your temporary password (from Email 2).
- Follow the prompts to create a new password of your own.
Step 3: Check your email for the MFA message
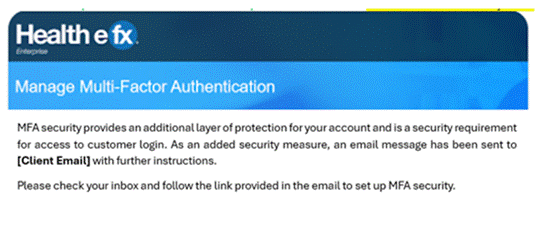
After you create your new password, you will see the screen below on the Equifax portal. This means Equifax has sent you a third email so you can begin setting up MFA.
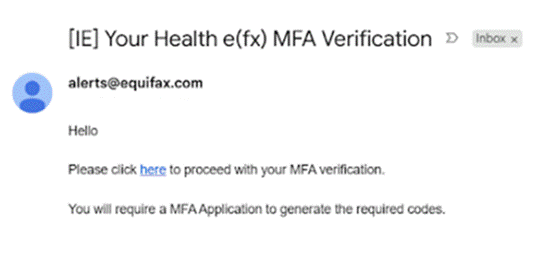
- Go back to your email inbox and open the message titled “Your Health e(fx) MFA Verification.”
- Click the blue word “here” in the email.
Part 2: Set Up MFA on Your Phone
Step 4: Sign in again
After you click the link, sign in with your username and your new password into the Equifax portal. You will then see the MFA setup screen below.
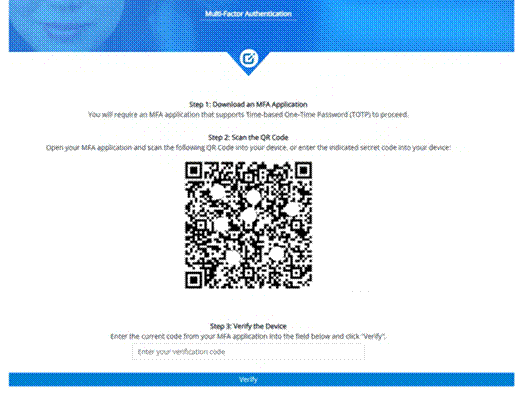
The screen shows three steps:
- Download an MFA application (an “authenticator app”) on your phone.
- Scan the QR code on the screen with your phone.
- Enter the verification code from your phone and click Verify.
|
Good to know Keep this screen open on your computer. You will use your phone for the next steps. Many phones already have an authenticator built in, so you may be able to skip the download in step 1. |
Step 5: Try scanning the QR code with your phone
Start by checking whether your phone can already scan the QR code. Open your phone’s quick settings by swiping down from the top of the screen, then:
- Android: tap the Scan QR code button.
- iPhone: tap the Camera button.
- Microsoft Authenticator
- Google Authenticator
- Yubico Authenticator
Then point your phone at the QR code on your computer screen.
|
Android
|
iPhone |
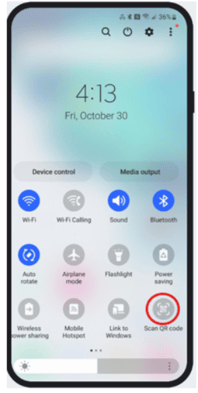
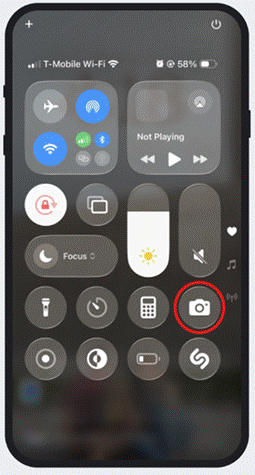
Step 6: Download an authenticator app (if needed)
If your phone does not have an app that can read the code, it will usually offer to download one after you try to scan the QR Code. You can also open the Google Play Store (Android) or the App Store (iPhone) and search for an authenticator app.
Popular choices include:
- Microsoft Authenticator
- Google Authenticator
- Yubico Authenticator
Any of these will work. Choose the one you prefer.
Step 7: Scan the QR code with your authenticator app
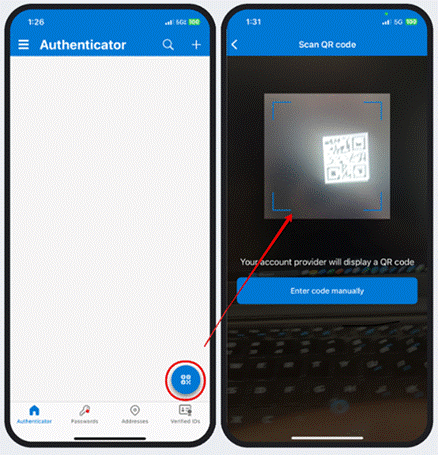
Open your authenticator app and scan the QR code on your computer screen. The screenshots below use Microsoft Authenticator as an example. Yours may look different depending on the app and phone you chose.
First time using the app: tap Add account, choose Work or school account, then point your camera at the QR code.
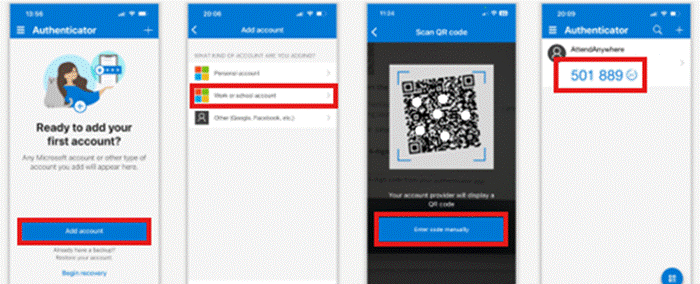
Already have the app: tap the blue QR code button in the bottom-right corner, then point your camera at the QR code.
Step 8: Enter your code in Equifax
Once the QR code is scanned, your authenticator app will show a number code. Type that code into the verification box on the Equifax website screen on your computer, then click Verify.
|
Google Authenticator |
Microsoft Authenticator |
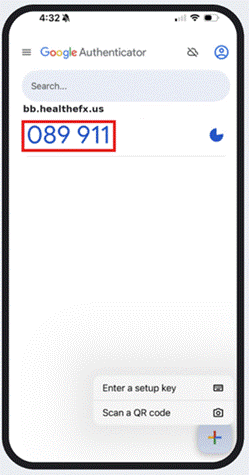
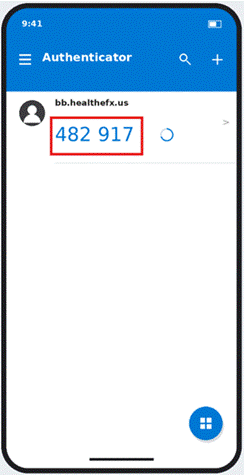
The code in the red box is the one you type into Equifax. The code changes every so often, so if it changes before you finish typing, use the new one.
That’s it! You now have access to your company’s ACA 1095 information.
|
Remember: this happens every time you sign in Each time you sign in to Equifax, you will need to open your authenticator app and enter the current code. Keep the app on your phone. |